

 Supplies needed: 5 copy paper boxes, brick bulletin board paper, scissors, packing tape, regular clear tape, and about 45 minutes!
If you don't want to make your own, I have a pre-made fireplace option you can purchase on Amazon below! Scroll down.
Step 1: Beg your custodian and secretary to save 5 copy paper boxes for you (or a box of similar size). As you can see in my picture, I also used a Scholastic book box and another box that just happened to be almost the same size. Also gather all the above supplies so you don't have to stop and look for them as you create.

Step 2: Lay your boxes flat on the floor in the fireplace shape you desire and go crazy with the packing tape (or masking/duct tape). No one will see the tape, so use a lot and don't worry about the wrinkles. You want to make sure that your pieces are all sturdy enough to hold up your decorations later on, so especially wrap a LOT of tape around that top middle piece. I flipped my boxes around as I taped to make sure I taped ALL 4 sides generously.


Step 4: Set your fireplace up and use packing (clear) tape to tape the sides around the back of the boxes and the bottom. Now you are ready to fold the top of the paper down on top of the fireplace mantle. Just fold it like a present. I didn't do any extra cuts. Just fold and tape down in the back and on the sides. (where the "mantle" is).
 Step 5: Now you are ready to cut out the fireplace area! I simply found the center and cut a slit in the paper up to the "mantle" box. Then I slid my scissors under that middle "mantle" box to cut it so I could tape the two flaps on the "inside of the fireplace." I did not worry about covering the bottom inside of the "mantle" box.
 Step 6: Bam! Finished! You can see in the picture with my sweet 10 year old son helper that the paper wrinkled a bit in spots, but I seriously didn't worry about it. I did smooth out a few spots and taped them down in the back, but since I will just be leaving this up for a few months, I didn't stress over a few wrinkles (much like I don't stress over a few wrinkles on my face now either)!

I am soooooo excited for this mini classroom transformation because as you can see, I decorated for Thanksgiving, Christmas and I will change it over in January to a winter theme. I may even keep it up for February! My students have already enjoyed reading by the fireplace. For a bit of extra fun, you can see I put a box of Holiday books in a box next to the fireplace and I added a cheesy, cheap and fun fire with logs. Directions on that are below.

Since my students can't all fit around the fireplace, somedays I also display a live fireplace on my Smartboard and turn off the lights. It is usually bright enough for my students to read since we have several windows. Here is a link to a Christmas themed fireplace with crackling noises on YouTube, but you can just search for "fireplace" on YouTube and you will get tons of options.
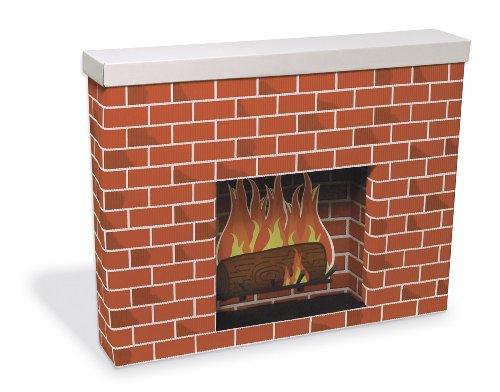
If you don't want to make your own fireplace, but you like the idea of purchasing a pre-made fireplace, this is such an amazing option! It is a free-standing cardboard fireplace that would cost just a few dollars more than building your own!
 To make the fake fire and logs, I used one paper bag from the grocery store to make 3 quick logs. I cut the bag into 3 pieces, rolled them up and stapled them. I wadded the paper a bit to make them look more rustic, stapled the three logs together and threw in some red, orange and yellow torn construction paper. I just simply stapled the three colors to the middle of the "logs" here and there. They aren't beautiful, but it looks so cute!
Here's to a fun new tradition in your classroom!


No comments